Follow the steps below to Create and Send and Consignment to your chosen Carrier.
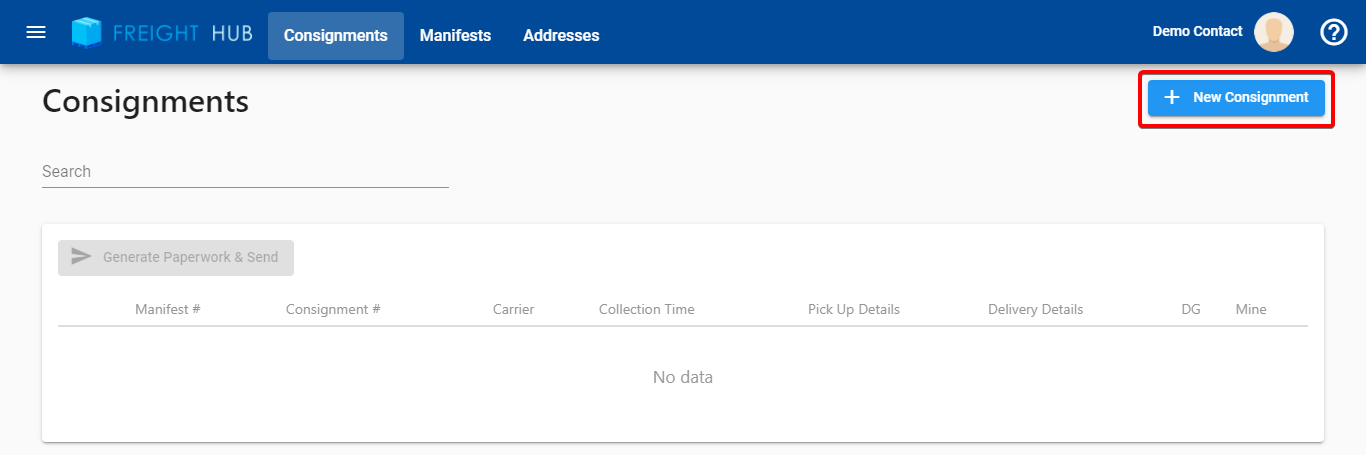
Step 1. Click the "New Consignment" button on the Consignment screen
When you login to your account, you will be taken to the Consignment screen. Click on the New Consignment button on the screen as indicated below:
A new Consignment will then be created with your default Carrier Account & Sender Address:
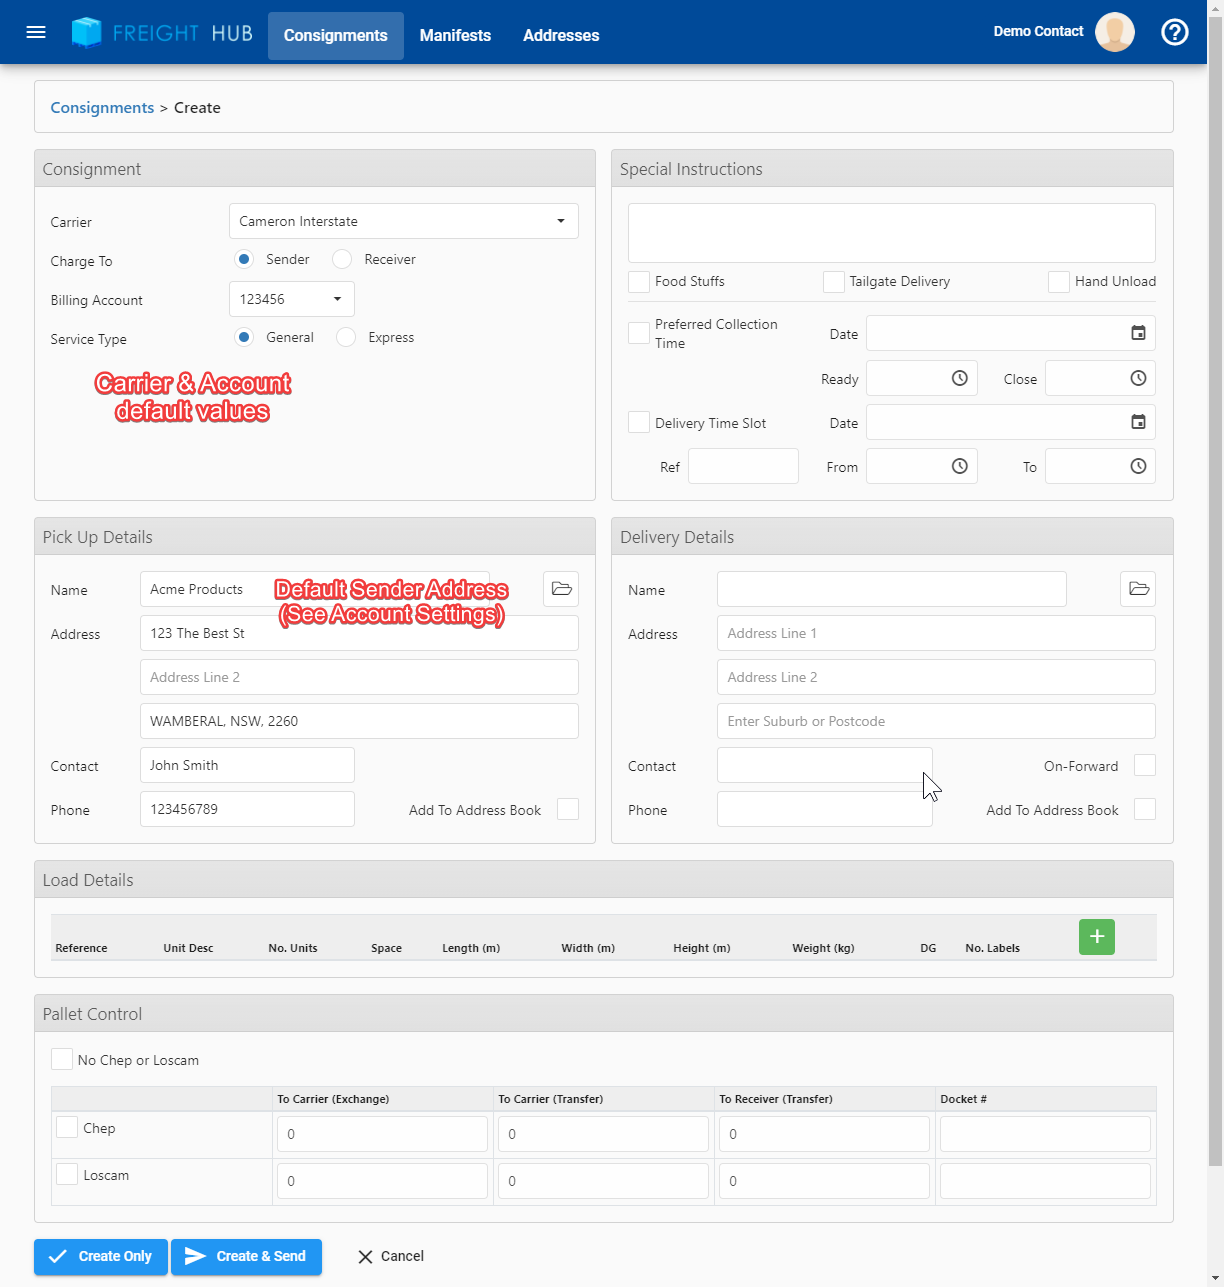
If the Sender Address is blank, please update your Default Sender Address using the link below:
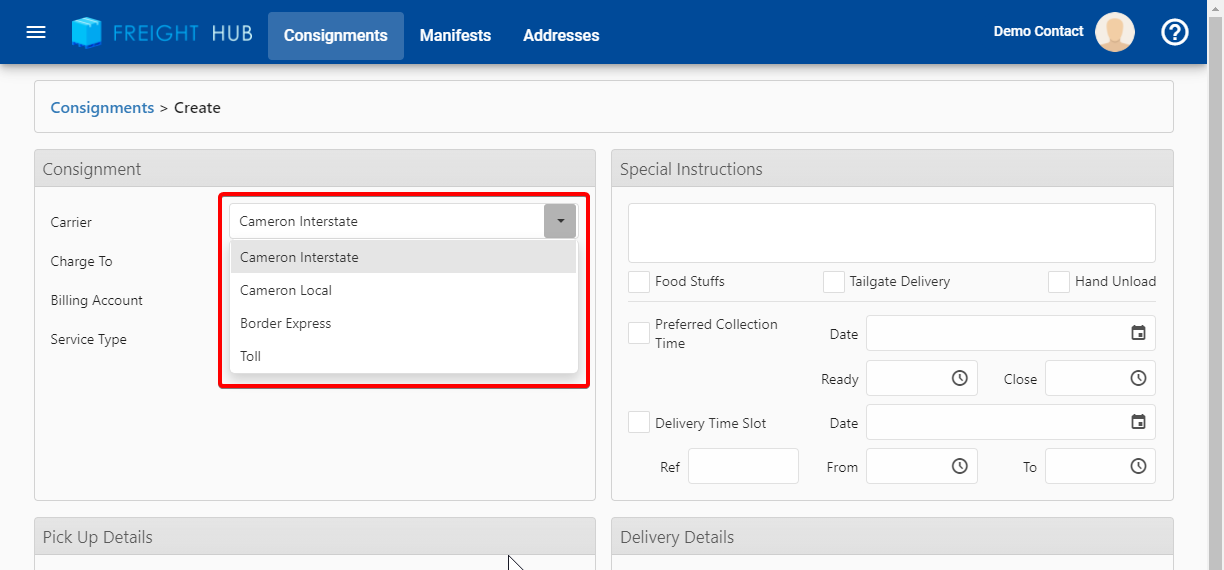
Step 2. Choose the Carrier, Account & Service details
Choose a Carrier from those assigned to your account:
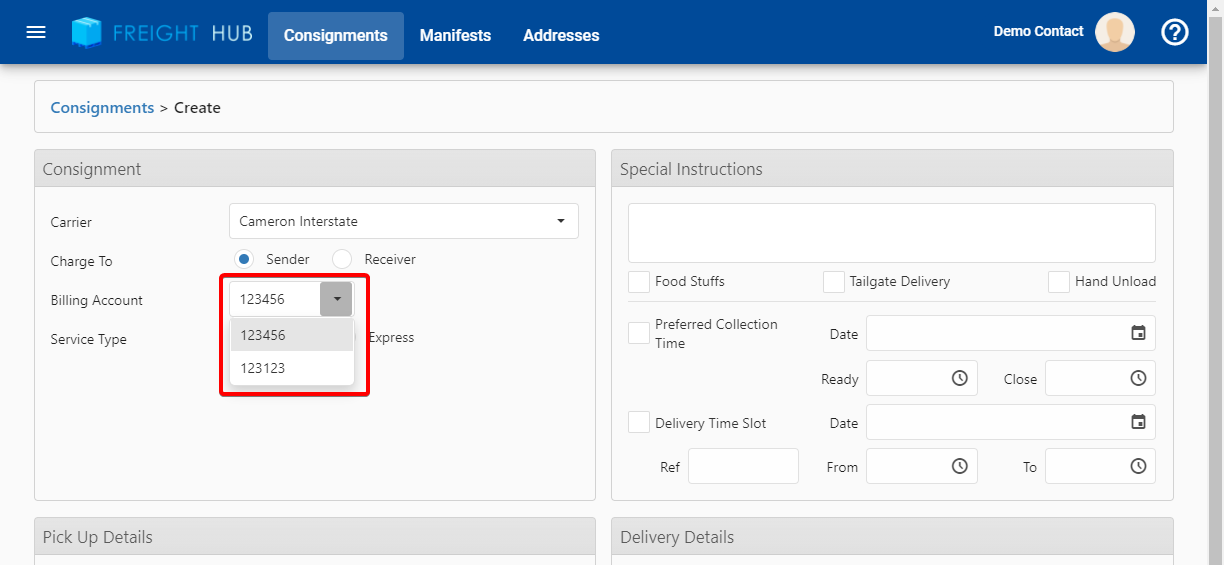
Optional: if you Then select the Billing Account from those available:
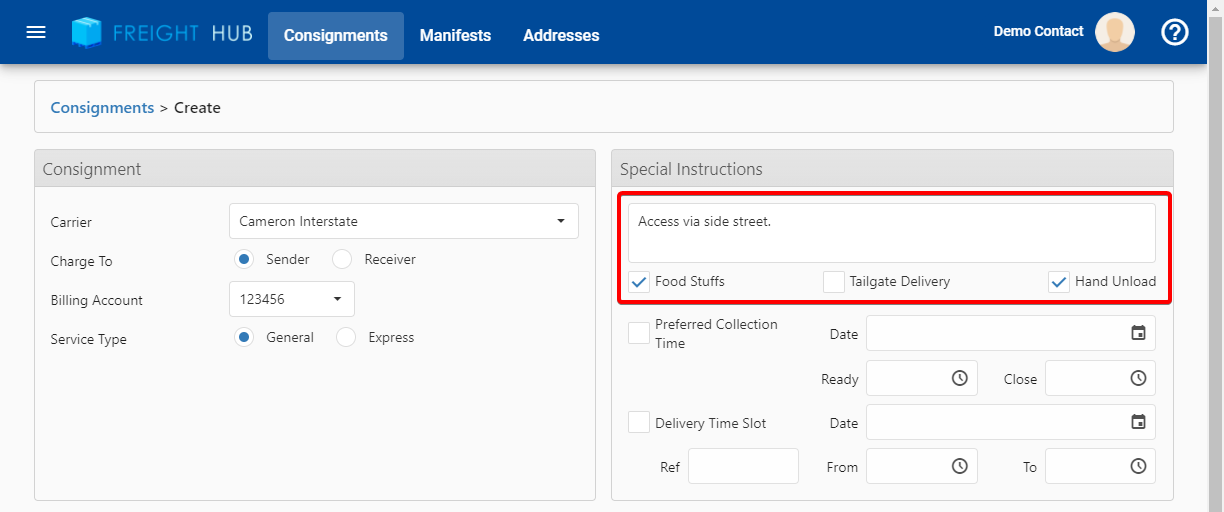
Step 3. Enter any Special Instructions & Pick Up or Delivery Preferences
Enter any Special Instructions or handling requirements as shown below:
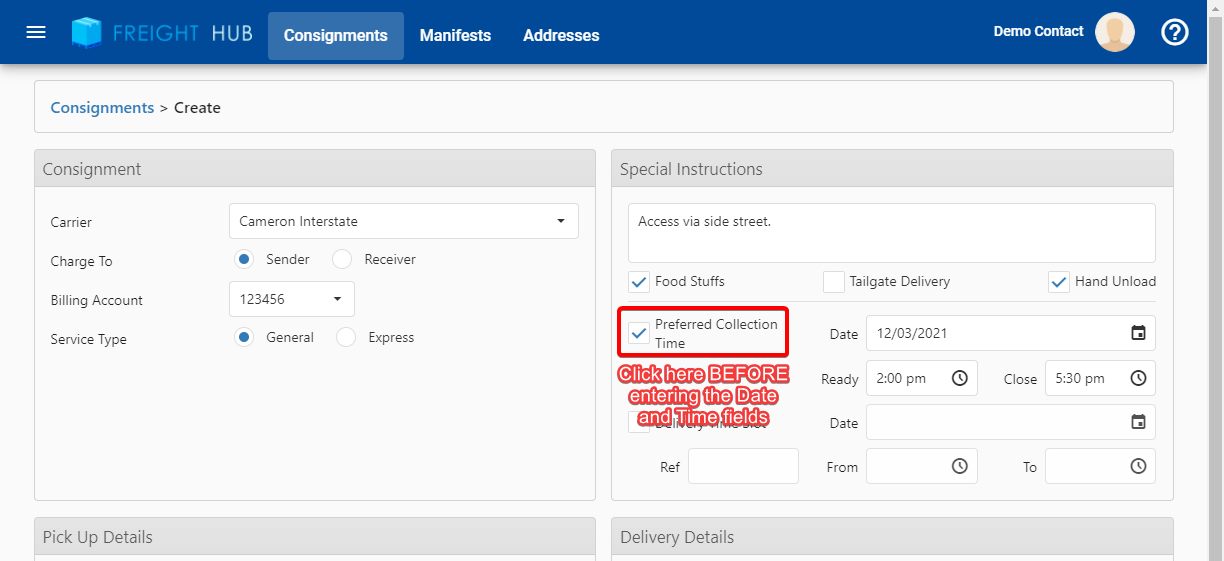
If you would like to request a Preferred Collection Time, please click the Check Box as indicated below, then enter the Date, Ready and Close Times:
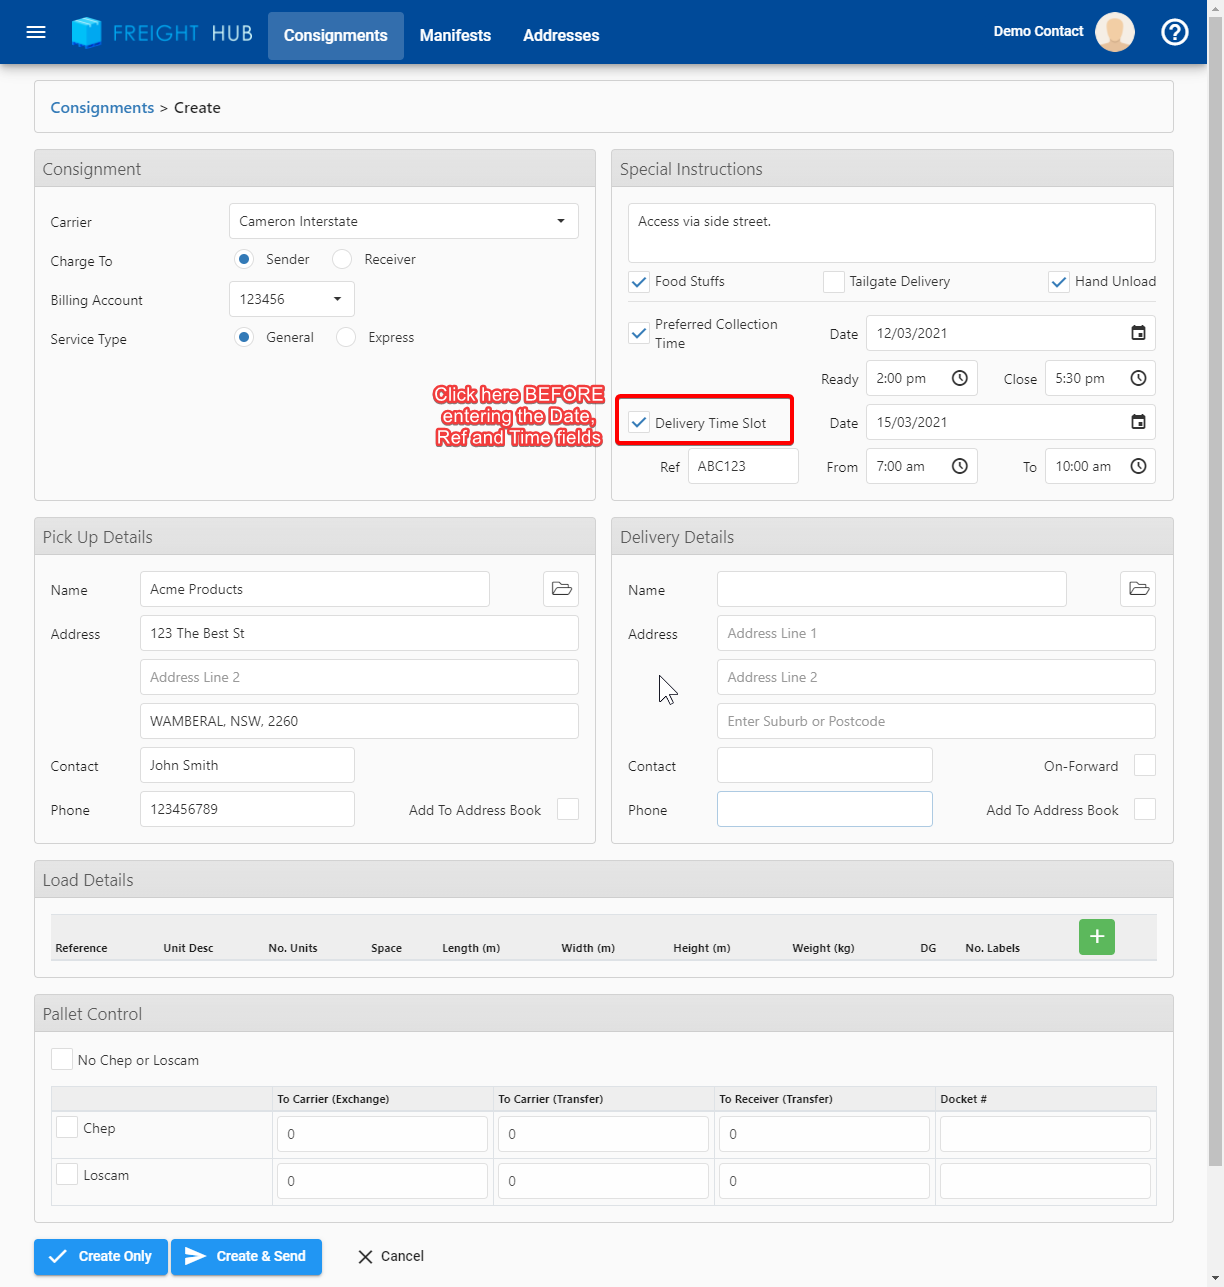
If you would like to request a Delivery Time Slot, please click the Check Box as indicated below, then enter the Date, Reference, From and To Times:
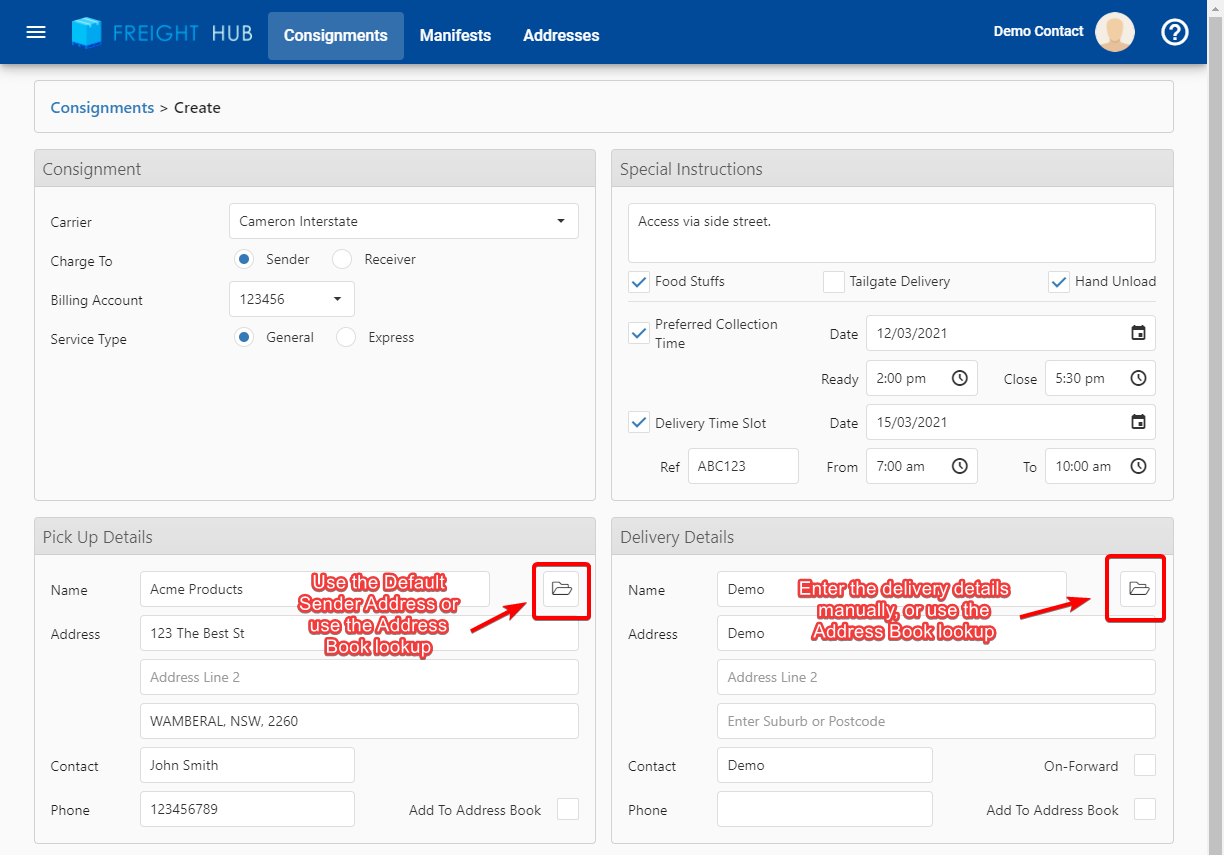
Step 4. Update the Pick Up & Delivery Address Details
Update the Pick Up and Delivery Details manually, or choose from the Address Books as shown below:
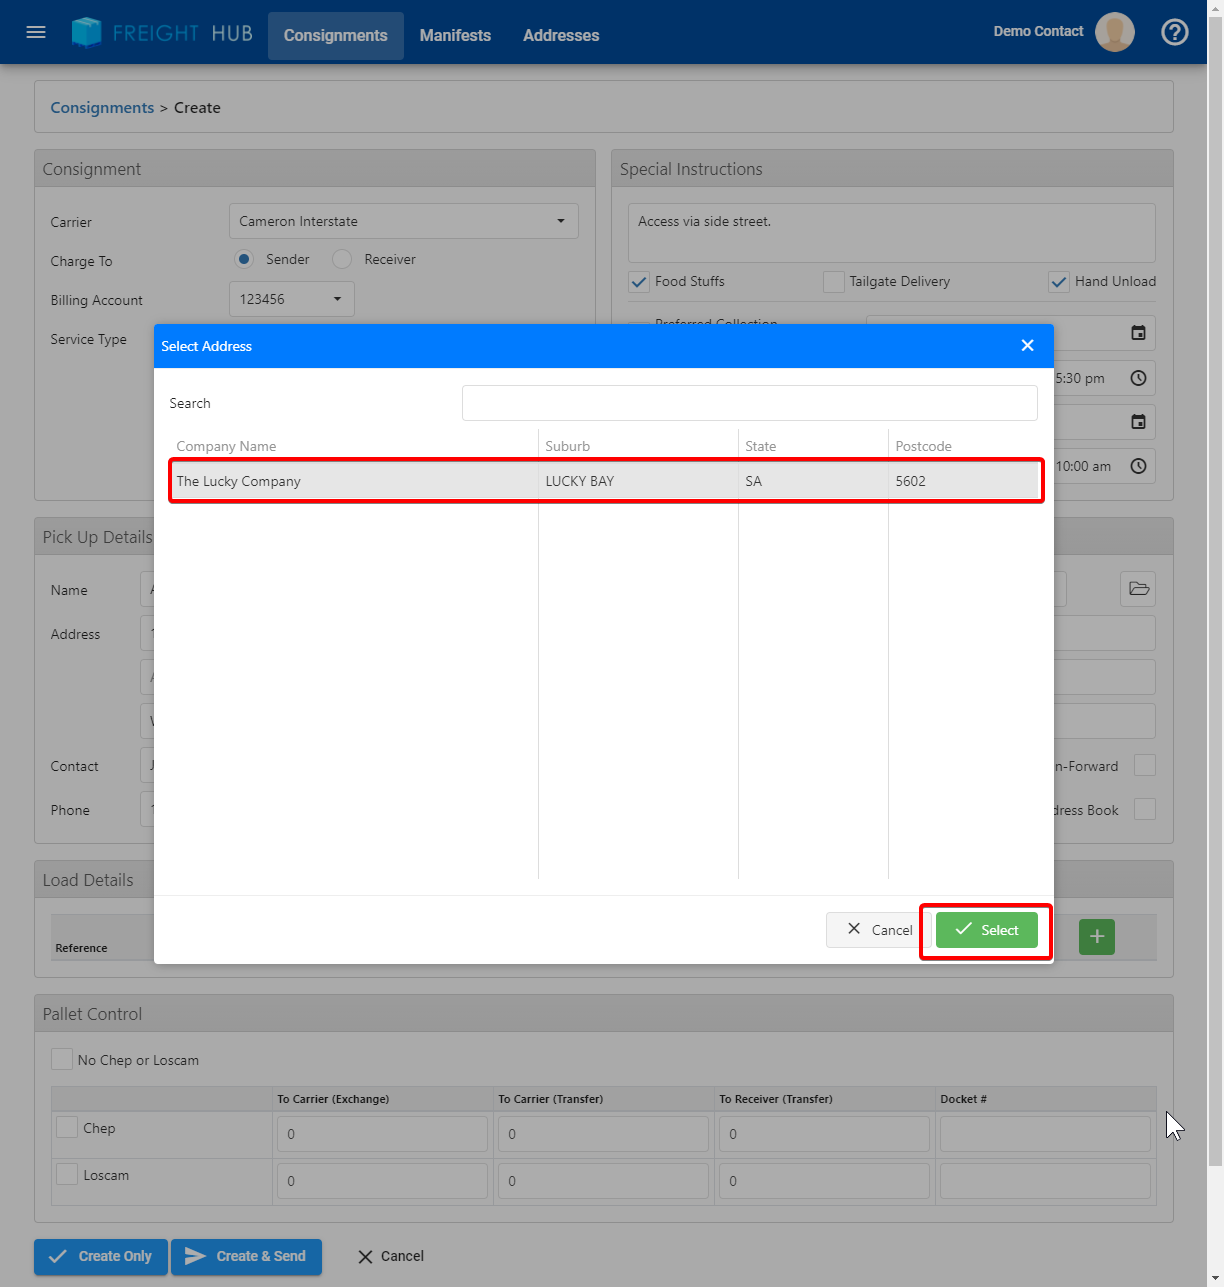
If you click on the Pick Up or Delivery Address Books above, simply select an Address from the list and click the "Select" button:
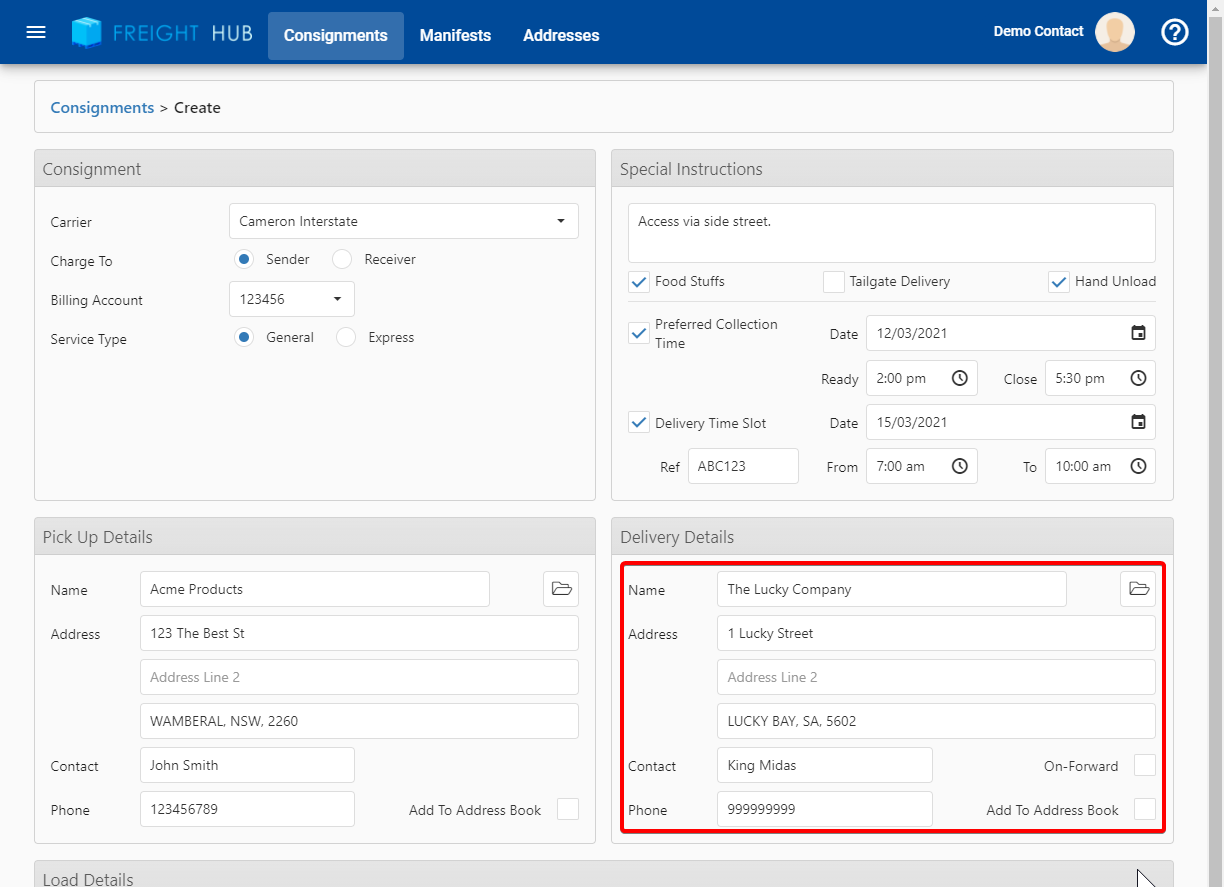
The selected Address will be applied to the respective Pick Up or Delivery Address:
Step 5. Enter the Load Details & any related Dangerous Goods requirements
Load Details
At least 1 Load Detail is required per consignment. Click the "+" button to Add a Load Detail:

Enter the required Load Details, then click "Add":

The Load Detail is now added:

Continue the above process to add any further Load Details required.
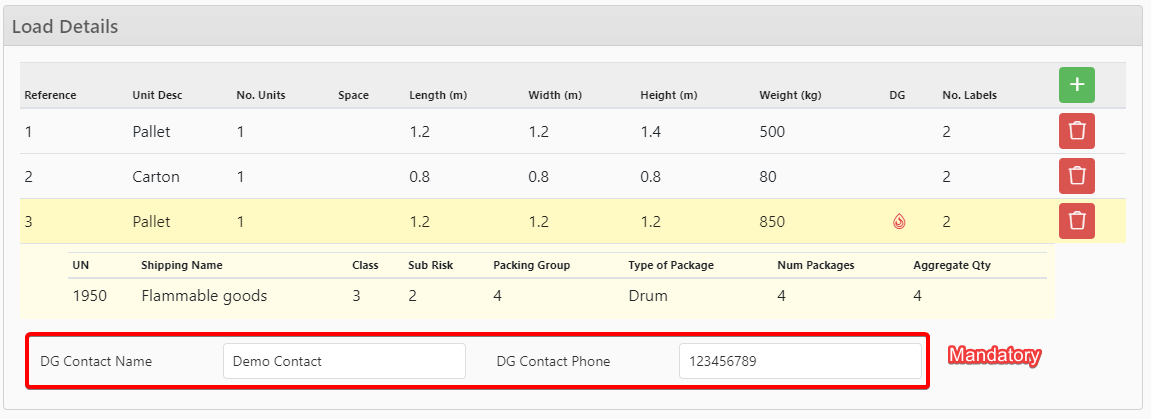
Dangerous Goods
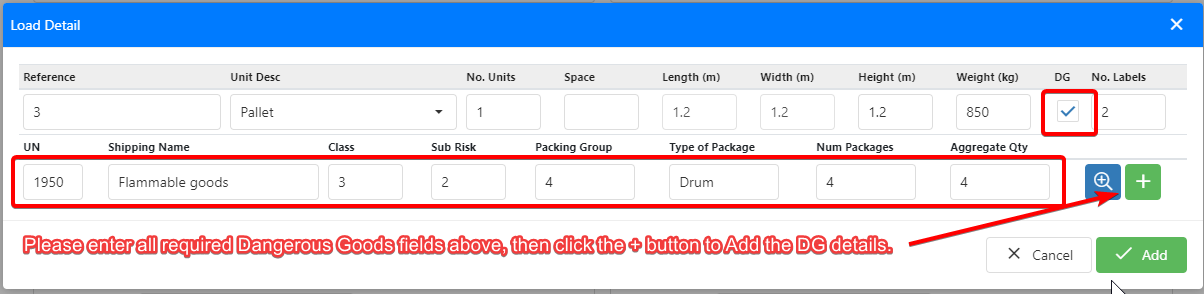
To enter the Dangerous Goods information for a Load Detail, click on the "DG" Checkbox as shown below:
Once the first DG Line is added, you can continue to add multiple Dangerous Goods lines for the Load Detail (for example, mixed DG pallets):
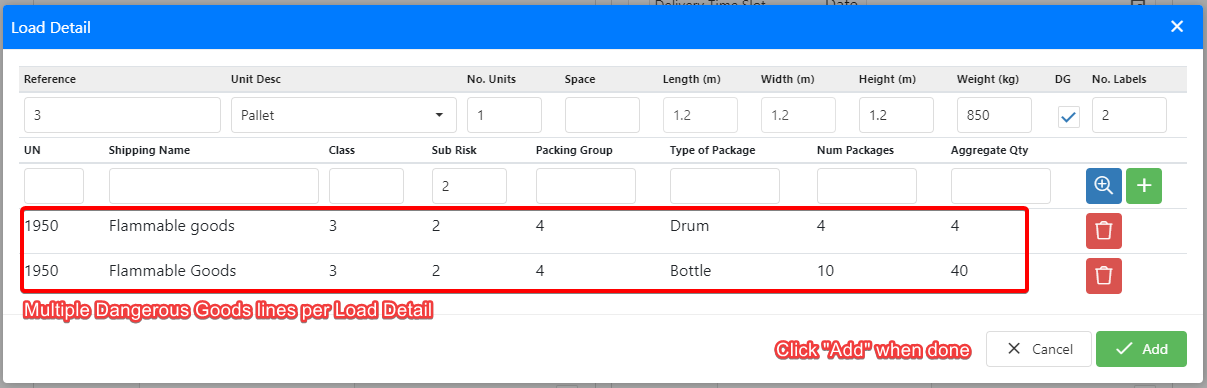
Once you are finished entering Dangerous Goods, click "Add" to add the Load Detail. You will then need to complete the Dangerous Goods contact information:
The article below descibes how to update your default Dangerous Goods settings
Step 6. Update Chep/Loscam Pallet Control
For each consignment, you must explicitly enable or disable the Pallet Control options before creating the Consignment.
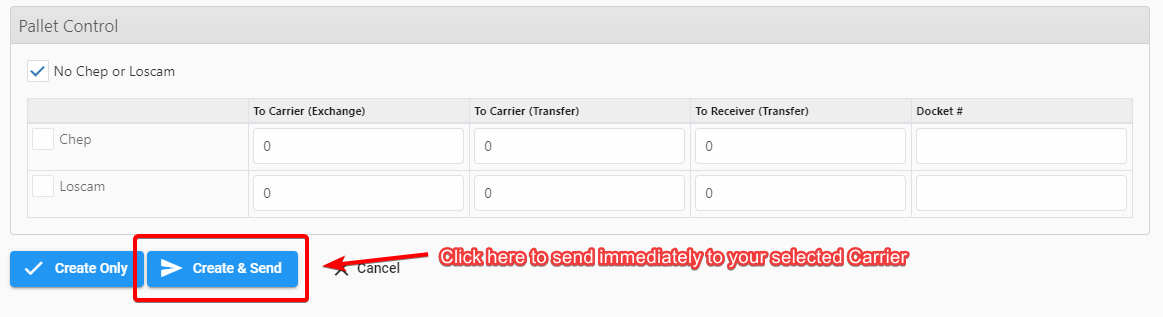
No Pallet Control required
If you do not wish to specify any Pallet Control options, simply select the "No Chep or Losam" option below:

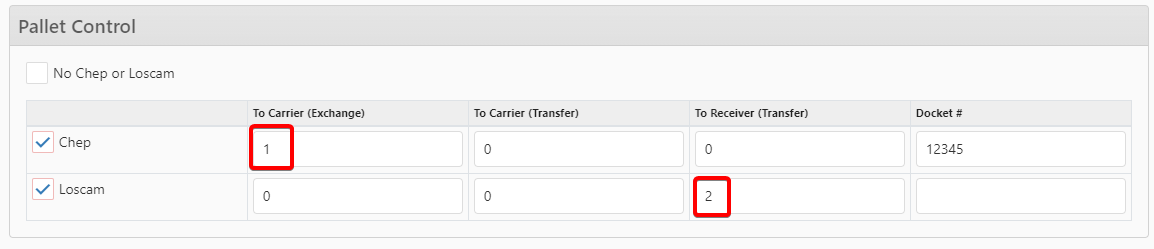
Chep or Loscam Pallet Control required
Click the desired Chep or Loscam option from Pallet Control:
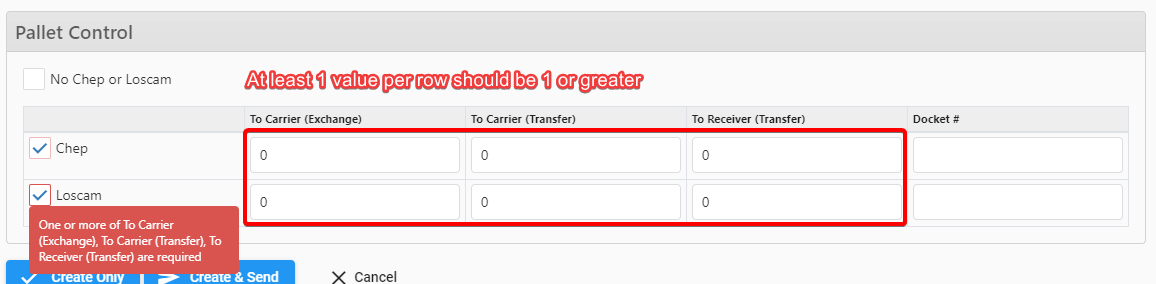
You must then provide a value of "at least 1" for Chep or Loscam respectively (Docket # is optional)
Step 7. Click the "Create & Send" button to send to the chosen Carrier
To send the Consignment immediately to your selected carrier, just click "Create & Send" as shown below:

You CANNOT make any changes after a Consignment has been sent!
Step 8. Print Labels
Once the Consignment is saved, you can optionally print your shipping labels now as shown below:
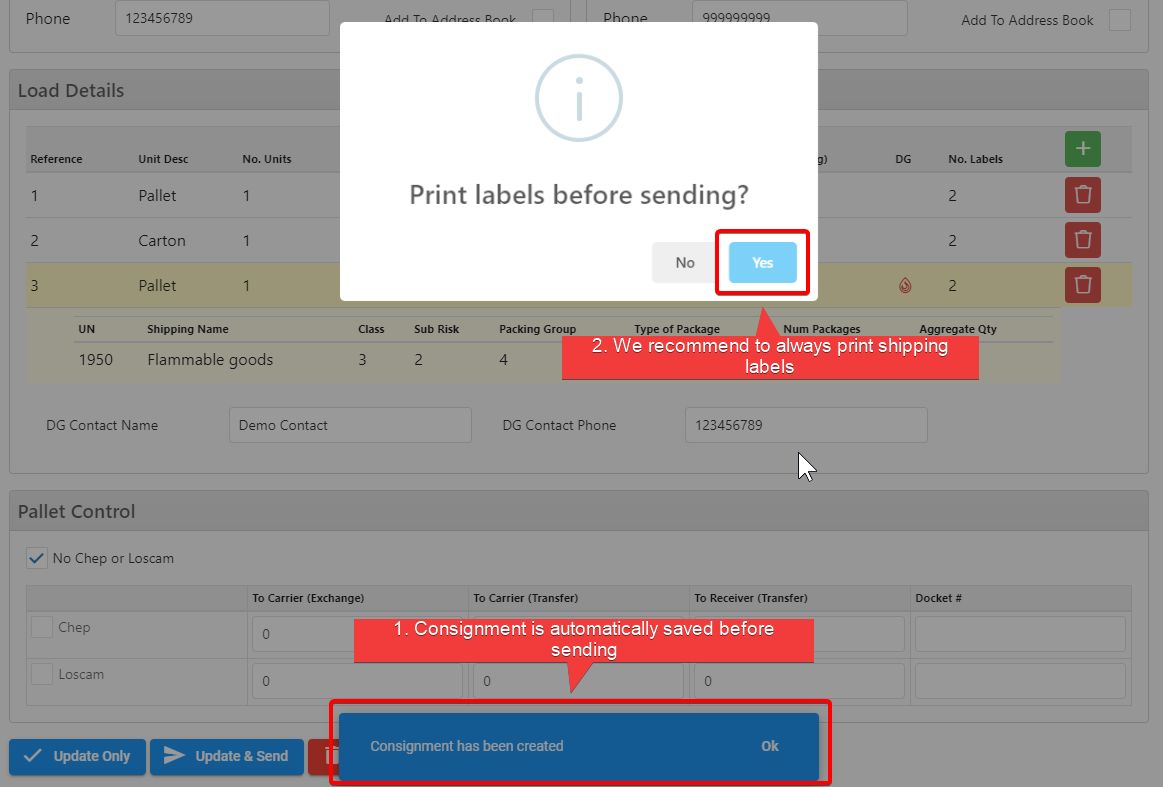
We recommend to ALWAYS print shipping labels for tracking.
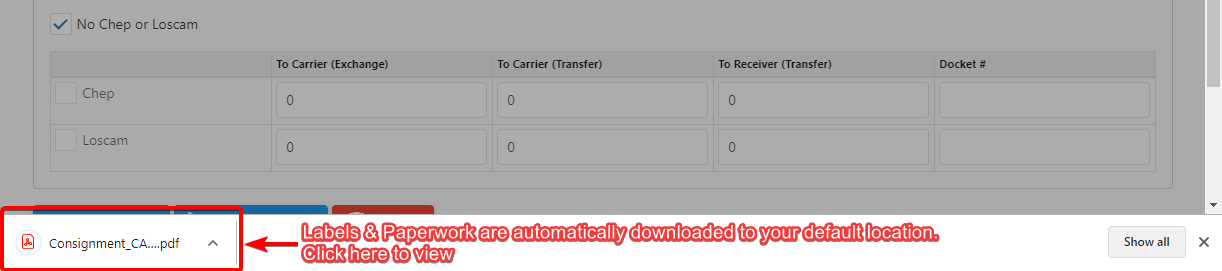
The Labels will be automatically downloaded to your default browser location as shown below:
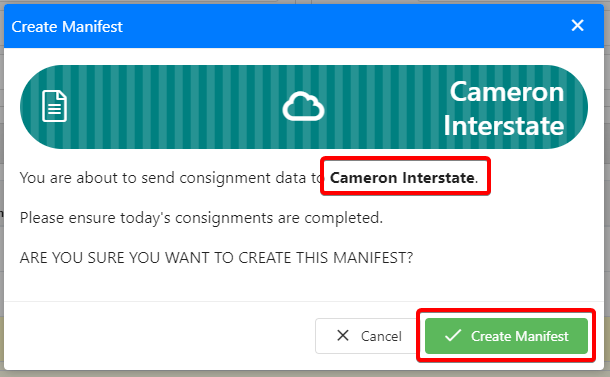
Step 9. Create Manifest & Send to Carrier
Click the "Create Manifest" button to immediately generate the Consignment & Dispatch Manifest Report before sending to your selected Carrier:
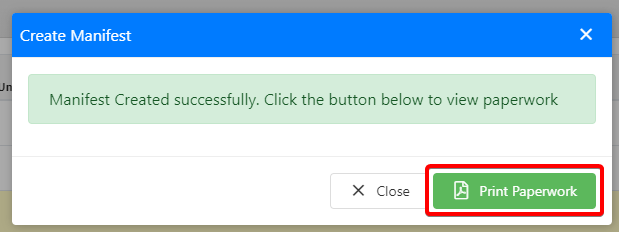
Step 9. Print Consignment & Manifest Report (Paperwork)
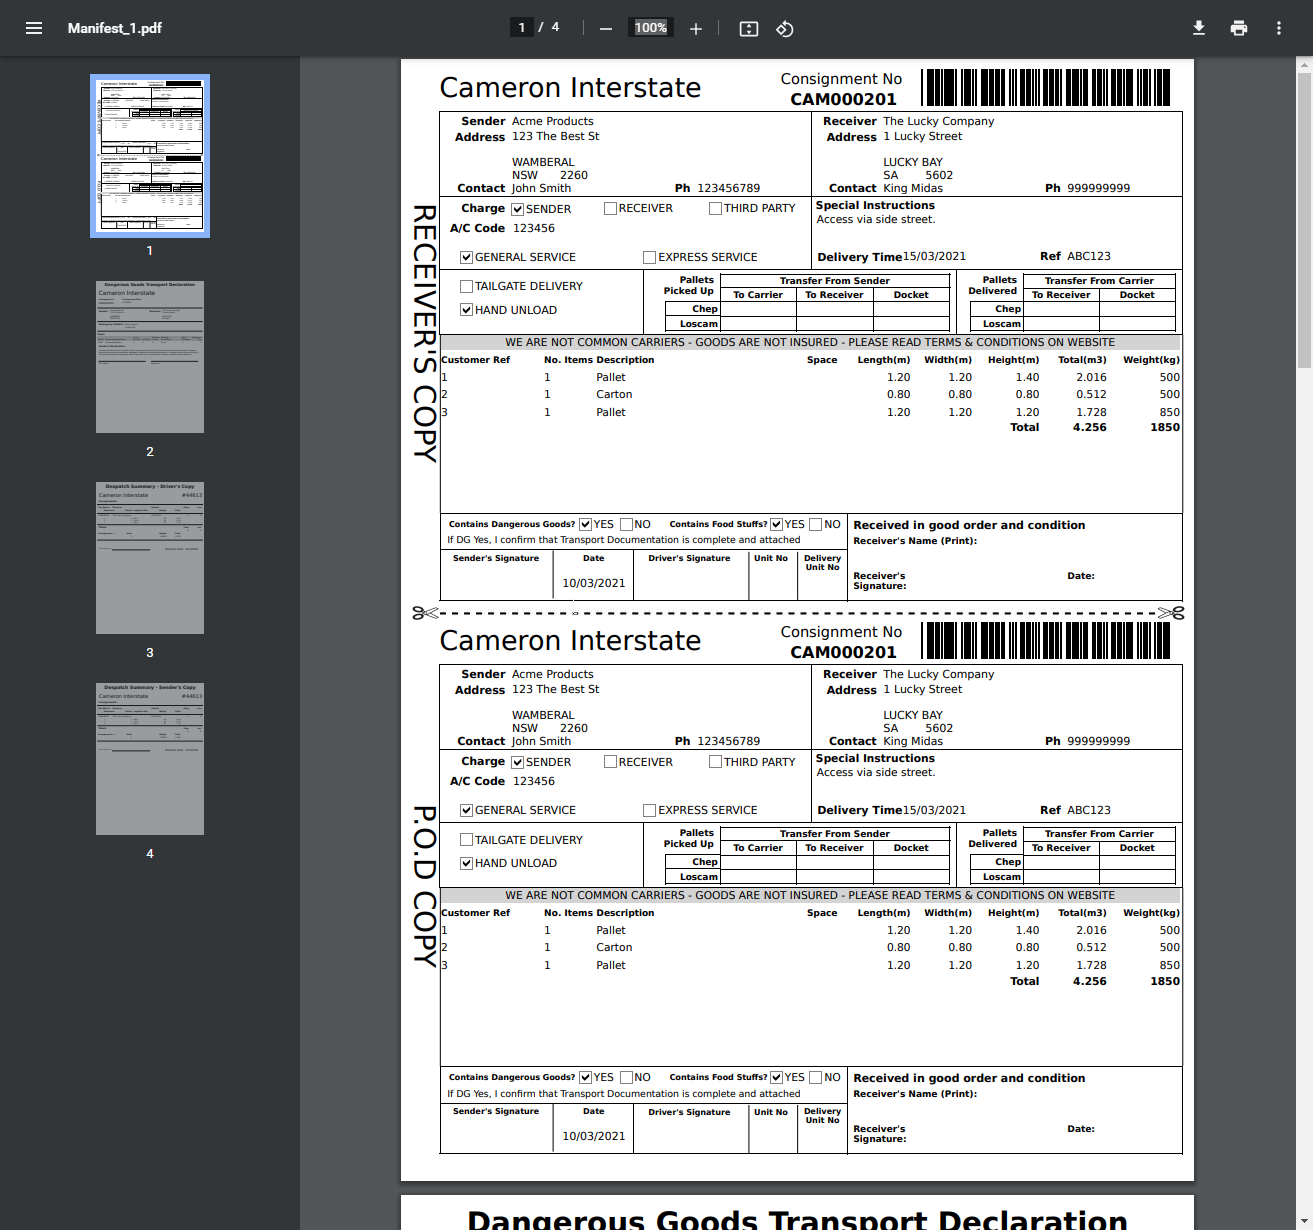
You can now download a PDF copy of your Consignment and Dispatch Summary using the button provided below:
The Manifest report will be downloaded to your default location as shown below:

Click on the downloaded document to open your Paperwork report:
Step 10. Consignment has been created & sent to Carrier
On the Consignment screen, the Manifest # will be shown next the Consignment as shown below:
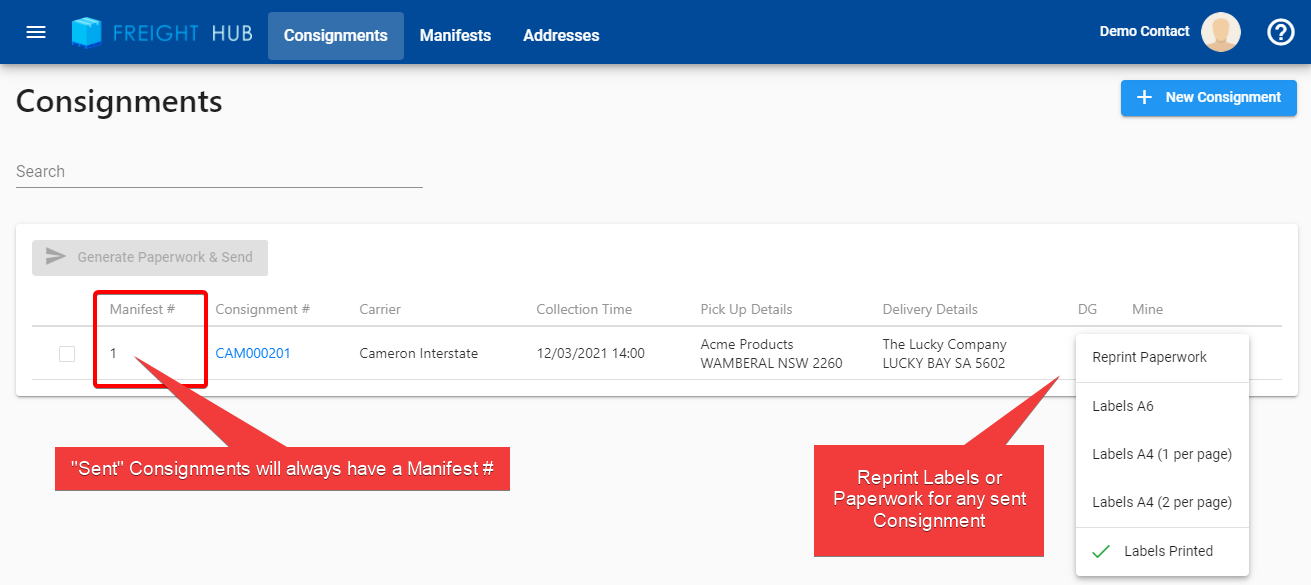
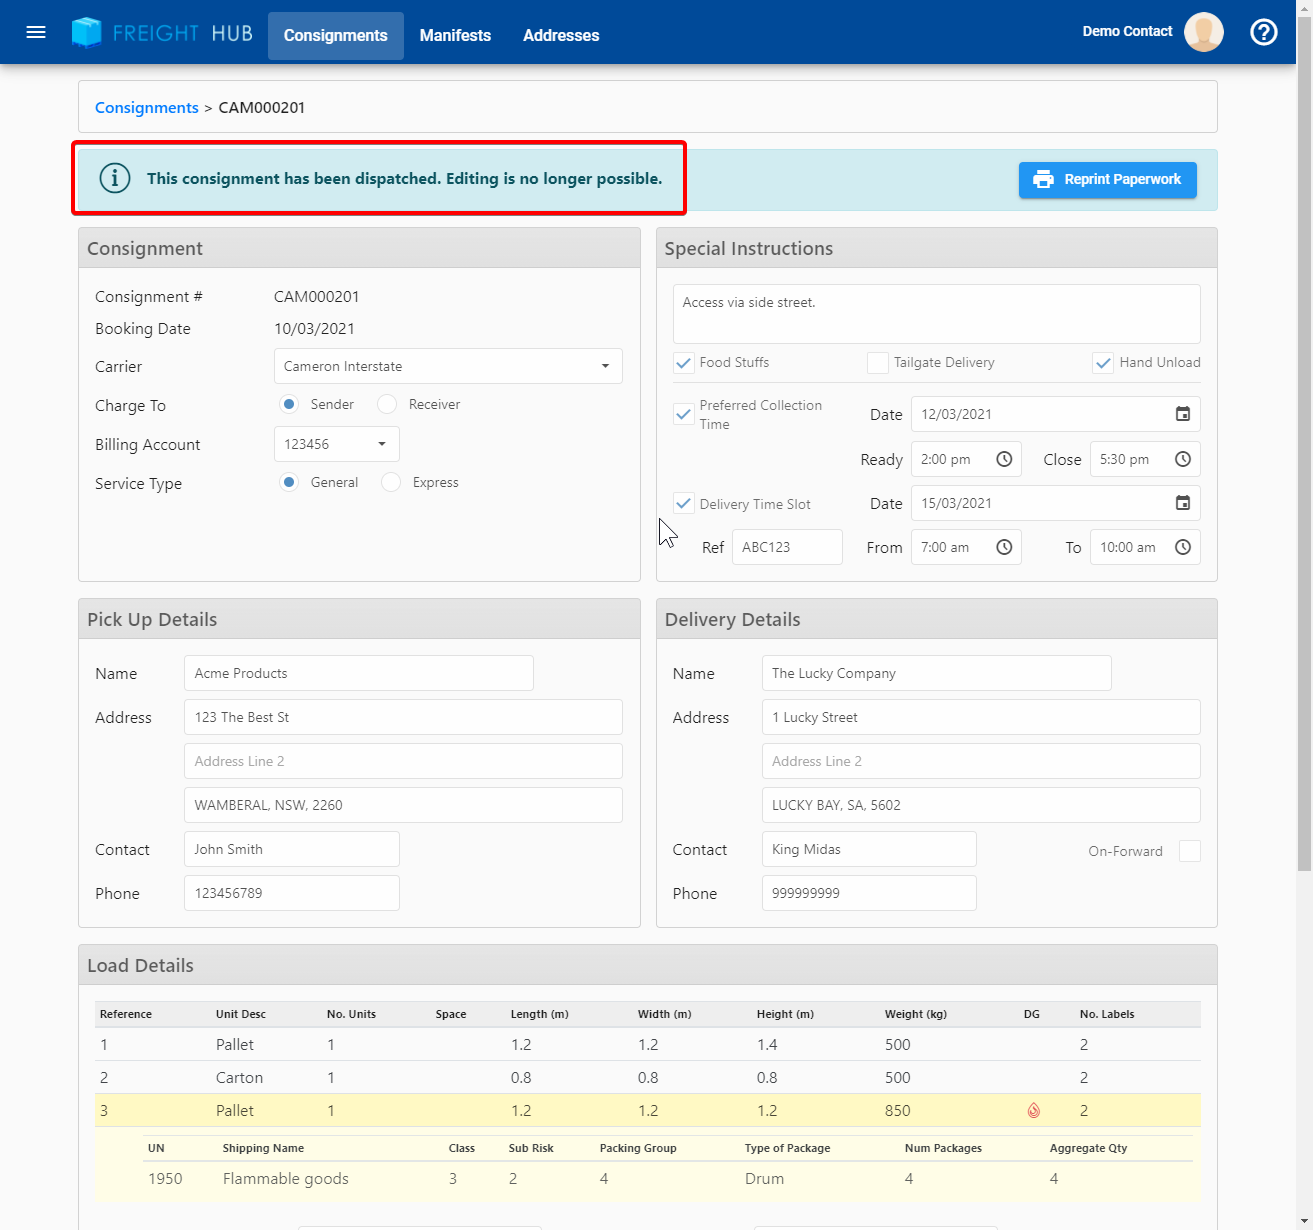
Clicking on the Consignment Number will allow you to view a Read Only copy of the sent Consignment data with an option to Reprint Paperwork:
To learn how to send multiple Consignments at once, click on the link below.
